Thursday, 20 January 2011

Improvements To Make - Opening

The feedback we had received was extremely useful. From it we have decided we have a few minor adjustments to make, which are:
- The font of the title
- The volume of the music

It is simple to change how loud the music is in iMovie by simply adjusting it. It is important we are able to hear the narrator's speech clearly as shocking statistics are being presented. Finding a volume that people would be happy with is a simple task, however...
Changing the title font is an issue! Due to the transition we have chosen there is only one font the software allows us to use. Since others and ourselves are not happy with the font it provides we are trying to work around this. From the website http://www.cooltext.com we created the following image:


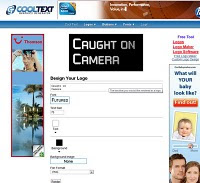
We plan to put this in the opening after the transition. The font we chose is what we feel most like the text that appears on CCTV cameras which is relevant to our documentary.

Unfortunately after trying this it didn't work as the gap between the transition and the image was a few second black screen which didn't look good. We decided to stick with the transition and leave the image.

Tuesday, 18 January 2011

The Opening Sequence

Here is the opening sequence completed. Unfortunately, as we didn't include parts from the storyboard and plan, it is shorter than we had originally planned. I feel that as it is shorter it keeps the audience enticed and gets straight to the point. We also replaced parts of the plan that were less obviously linked to CCTV such as including footage from the television show 'Big Brother'.

The Opening Voiceover


After having finished editing the transitions, videos and music of the opening it was time to finish it by adding the voiceov
er. After discussing with the rest of my group we decided that having a presenter could be a possibility when filming later interviews. We therefore decided that keeping the same voice throughout the documentary would keep a sense of continuity and it would seem more professional. We chose to use group member Cissie as the narrator as she is the most well spoken of us all with the most mature voice.
We had never used the school's microph
one before so we decided to make the most of the macbook's applications and tested it in GarageBand. The microphone had a mode specifically for voiceovers as it is a Yeti microphone. After adjusting the volume and a few tests of how close to be to the mic we were happy with the quality of playback.
From previous research we had done on the subject of CCTV we had a script prepared for the opening. We added more than enough facts to this script incase it was the original length we had planned - 30 seconds.

The voiceover was recorded straight onto iMovie and after testing it with different timings and saying different parts of the script with different sections of the opening we found what we thought was best. The final voiceover is on the video of the opening sequence which is in the post above.

Monday, 17 January 2011

Making the opening sequence

We had planned the opening sequence thoroughly including our powerpoint which is posted in a previous post and with a storyboard.

Using pictures we had taken at school and footage we previously filmed in London we began to edit the opening using the mac program iMovie. A large number of the shots were slightly shaky but using the stabilisation tool we were able to sort this out. We placed the clips in iMovie in a random order to add variety - for example; we didn't want two crowd shots next to each other. We sped up, cut, cropped and muted shots until we had a sequence we were happy with. One shot we were particularly happy with was a zoom in to a CCTV camera but unfortunately it was incredibly shaky. We then decided to re-film this shot at Weybridge station a few days later and edited it in. We were much happier with this shot and felt the sequence flowed nicely. Here is a screenshot of speeding up the new CCTV shot:


It was then time to add some transitions. From our previous knowledge of documentaries we had noticed a pattern - beginning with a cross blur. We took advantage of picking this up and added it to the beginning of our sequence so that it blurred into a shot of a crowd walking down oxford street. After testing a few transitions for the ending we found Lens Flare. This transition then leads to the title of our documentary 'Caught On Camera'.

Wednesday, 15 December 2010

Filming Schedule, Filming & More

As me and asia have jobs we felt it was important to make a filming schedule so that we knew when we were all availbale to film. The filming schedule will ensure we don't rush the filming as it is nicely spread out accross many dates. We also ensured we knew exactly where to film.


We took pictures of CCTV cameras all round our school. These will be useful for just putting in places of the documentary at a later date.


We filmed shots of CCTV in London - Specifically: Abbey Road and Oxford Street.

Inside the station we also filmed a television screen showing CCTV and another CCTV camera.


The shots filmed in London were unfortunately all shakey as we didn't take a tripod. Hopefully we will be able to edit this in iMovie. The shots in Oxford Street of the crowd (inspired by an image we found online) turned out well. We plan to speed up the pace though as the crowd was walking quite slowly. It shows the sheer amount of people in the street and the amount of people who are being caught on CCTV just by walking down a street in London. We planned to film in Abbey Road as we knew from a website online (http://www.camvista.com/england/london/beatles_abbey_road_webcam.php3) that there was CCTV there that was able to be viewed by anyone online. We thought we could use this in the documentary as it is quite a controversial thing to be happening.


There is also a peice of grafitti on a wall in London by the artist Banksy that we plan to use in the documentary that says "One nation under CCTV". It looks like this:


Friday, 5 November 2010

Presenting to the class

We made a powerpoint presentation with our ideas for the opening sequence of the documentary. This included images that looked like the shots we wanted which we found on google images. We then presented it to the class and filmed it. We hadn't informed the class of our idea before and we wanted feedback on it. We presented the powerpoint and then had a few minutes for people to ask questions and for us to answer them. The session was a success and we found it very helpful, especially as people liked and were interested by our idea. Just from this short powerpoint people were shocked by our topic.

Here is the powerpoint presentation that we used:

Wednesday, 22 September 2010

Practicing with the camera

Today in our lesson we got to practise interview techniques with a digital camera. Just using my group members we were able to film a few shots. To begin with we wrote down 3 questions - related to our topic of CCTV. We then wrote down shots we wanted to experiment with. These were:
1. Anonymous (where you do not see the person being interviewed's identity)
2. Two person shot (the interviewer and interviewee)
3. Interviewee talking (where you do not hear the question)
4. Just the interviewee (where you hear the question but do not see the interviewer)

We filmed these and made them into a short video which you are able to view below. I found this task very helpful as it showed what shots we wanted to use. For our documentary I feel that the anonymous style is not needed. I do feel that just the interviewee being in the shot is the best option.